
完成品
「Flaskで作ったWebアプリをAWS Elastic Beanstalkにデプロイしてみた」の第3弾では、Flaskでメモ帳Webアプリを作成し、それをAWS Elastic Beanstalkにデプロイする流れを書いていきたいと思います。ローカル環境ではMAMPを使用して動作確認をしています。ここでは、作成したメモ帳の動作について説明します。

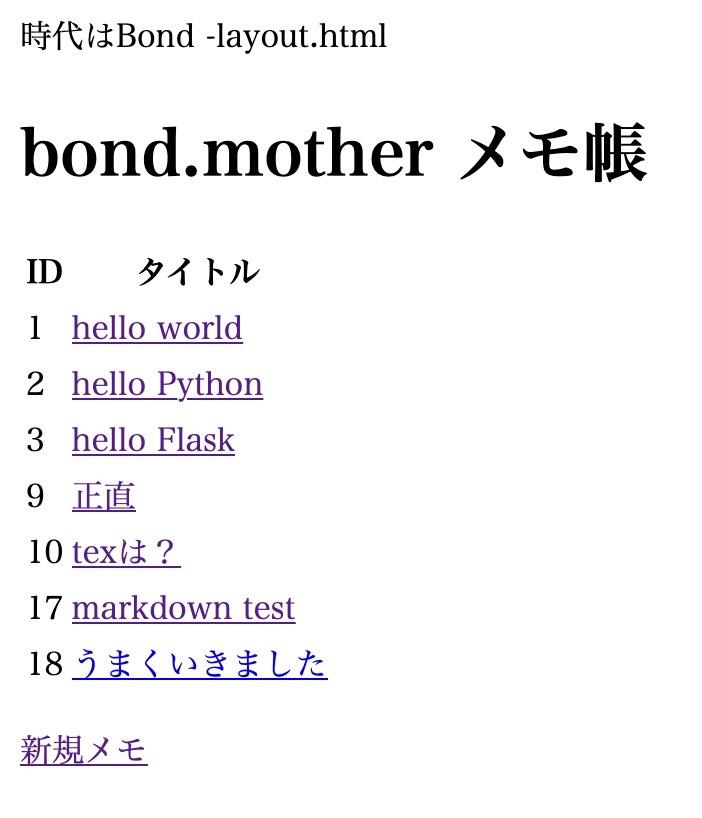
メモ帳デフォルト画面
使い方
保存
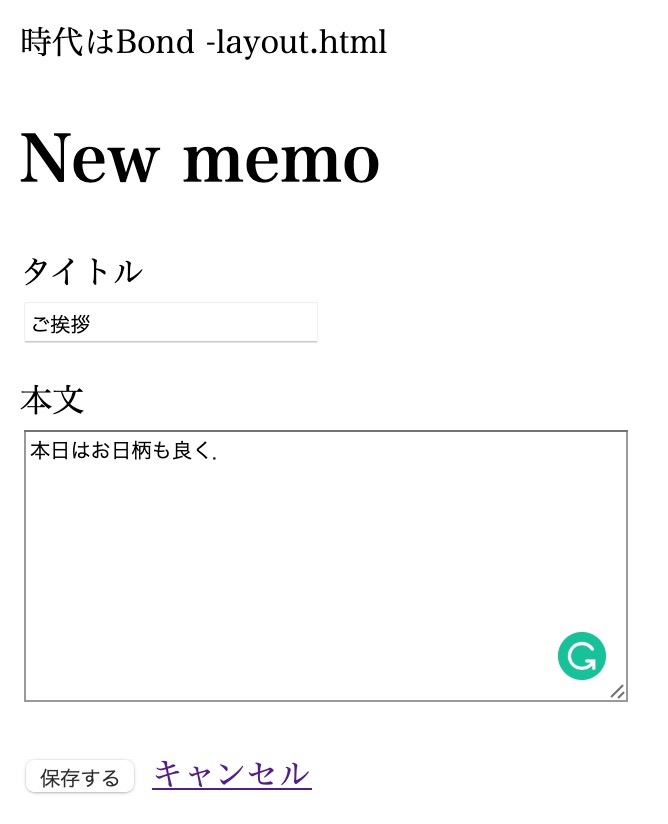
「新規メモ」をクリックすると、新規メモ作成画面「New memo」が開きます。

⬇︎
タイトルと本文をボックスに入力して、「保存する」ボタンを押します。
⬇︎
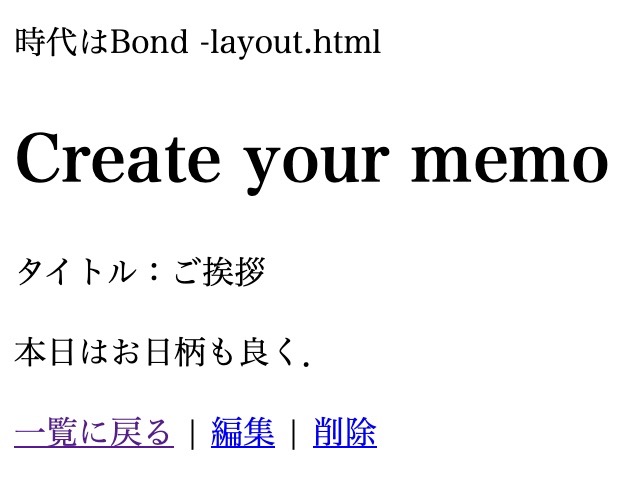
作成確認画面が表示されます。
⬇︎
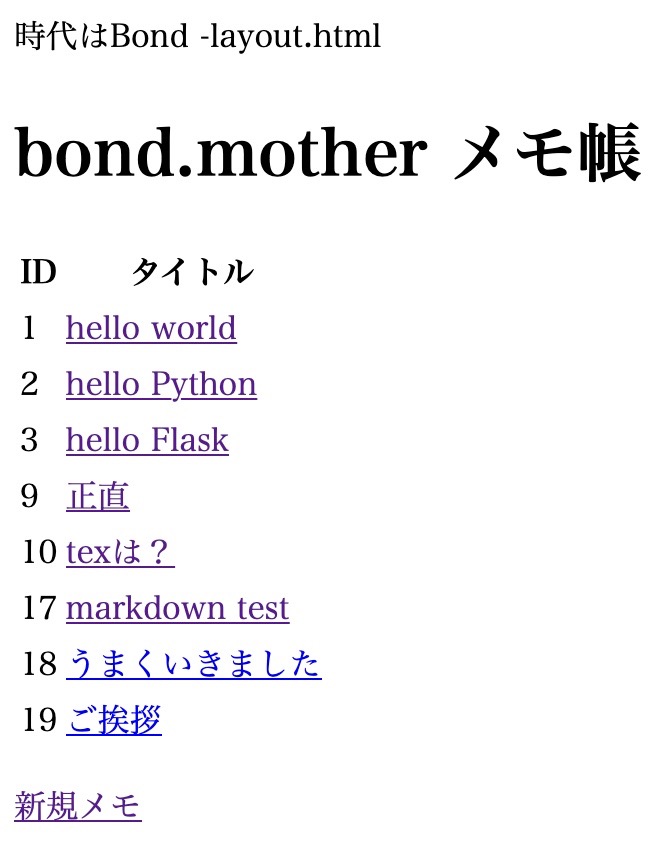
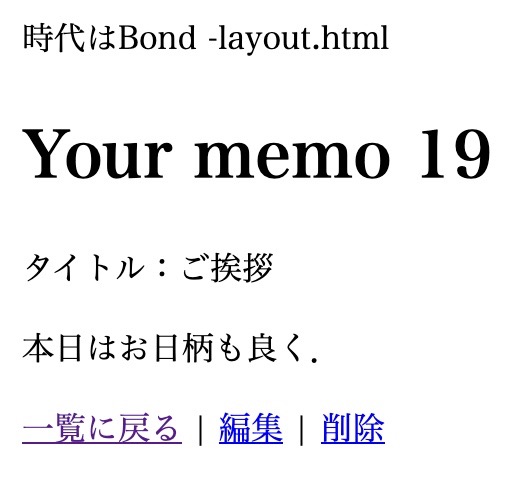
「一覧に戻る」をクリックすると、新しいメモが追加されていることが確認できます。
編集
追加したメモ「ご挨拶」をクリックします。
⬇︎
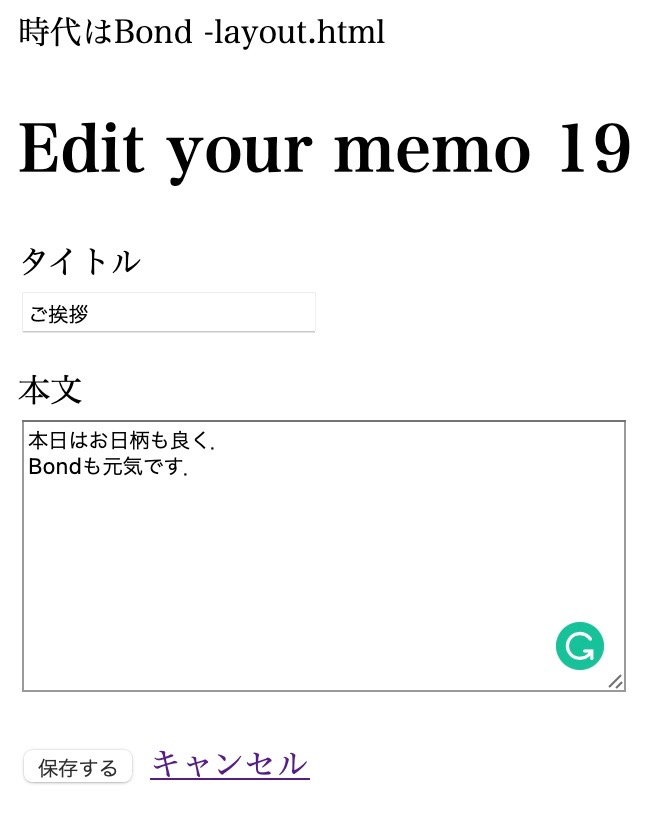
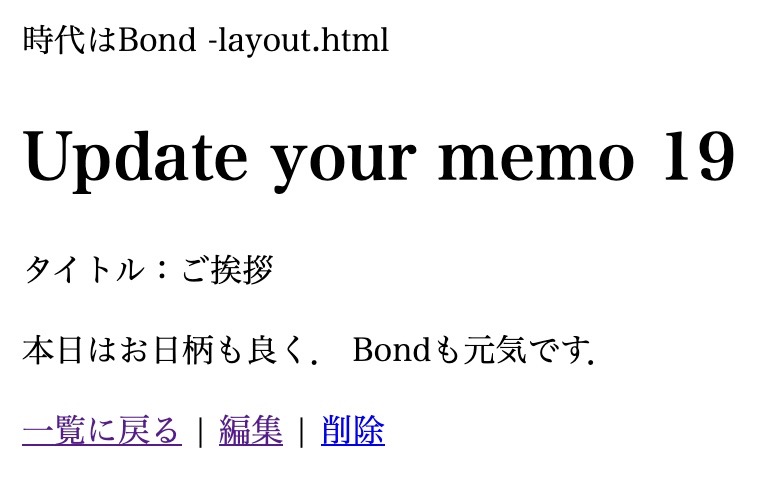
「編集」ボタンをクリックすると、メモの編集ができます。
削除
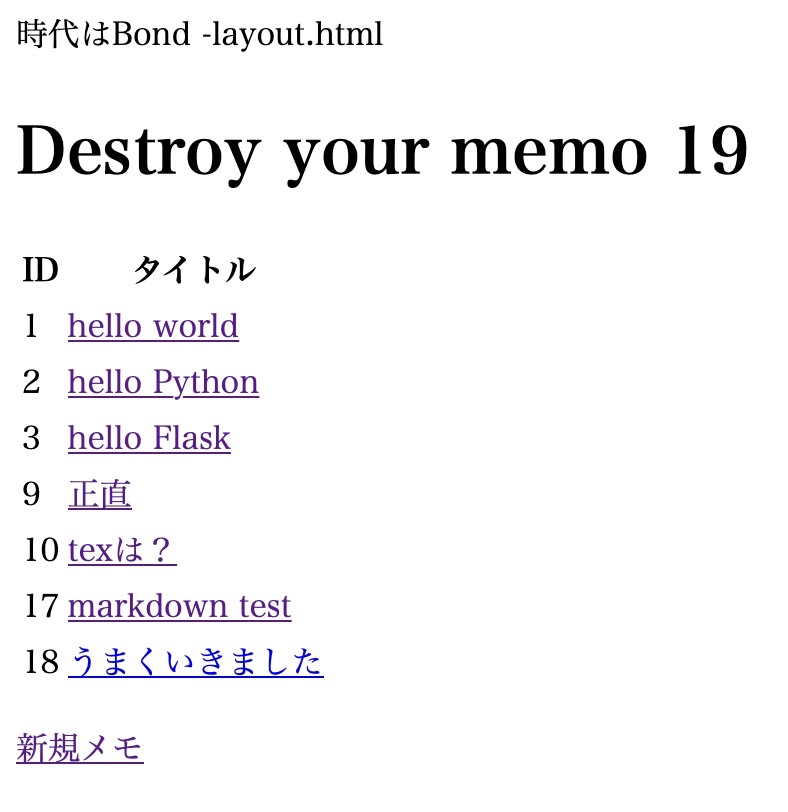
もう一度「ご挨拶」メモをクリックし、詳細画面で「削除」をクリックします。
⬇︎
一覧からメモが削除されていることが確認できます。
ソースコード
メモ帳アプリを作成するために必要なソースコードを以下にまとめました。
application.pyは、MAMP環境(ローカル)とEB環境(クラウド)とでURIの指定が異なります。
※【2021年2月22日 追記】
Elastic Beanstalkで環境にアタッチしたDBインスタンスの接続情報は、RDS環境プロパティを通じてアクセスできるため、EB用の「application.py」のデータベースURIを以下のように書き換えました。
〈書き換え前〉
db_uri = ‘mysql+pymysql://root:パスワード@RDSエンドポイント:3306/ebdb?charset=utf8’
〈書き換え後〉
db_uri = ‘mysql+pymysql://’ + os.environ[‘RDS_USERNAME’] + ‘:’ + os.environ[‘RDS_PASSWORD’] + ‘@’ + os.environ[‘RDS_HOSTNAME’] + ‘:’ + os.environ[‘RDS_PORT’] + ‘/’ + os.environ[‘RDS_DB_NAME’] + ‘?charset=utf8’
application.py(MAMP用)
from flask import Flask, request, render_template, send_from_directory
from flask_sqlalchemy import SQLAlchemy
from flaskext.markdown import Markdown
import os

application = Flask(__name__)
Markdown(application)

# flask_sqlalchemyによるMAMPデータベースへの接続情報
db_uri = 'mysql+pymysql://root:root@127.0.0.1:8889/memo?charset=utf8'
application.config['SQLALCHEMY_DATABASE_URI'] = db_uri
application.config['SQLALCHEMY_TRACK_MODIFICATIONS'] = False
db = SQLAlchemy(application)

# dbデータベースをPythonのオブジェクトにします
class Post(db.Model):
    __tablename__ = 'posts'
    id = db.Column(db.Integer, primary_key=True, autoincrement=True)
    title = db.Column(db.Text())
    content = db.Column(db.Text())

# メモの一覧画面
@application.route('/')
def list():

    message = 'bond.mother メモ帳'
    posts = Post.query.all()

    return render_template('list.html', message = message, posts = posts)

# faviconを設定
@application.route('/favicon.ico')
def favicon():
     return send_from_directory(os.path.join(application.root_path, 'static'),
                               'favicon.ico', mimetype='image/vnd.microsoft.icon')

# id番目のメモを表示
@application.route('/show/<int:id>')
def show_post(id):

    message = 'Your memo ' + str(id)
    post = Post.query.get(id)

    return render_template('show.html', message = message, post = post)

# 新規メモ受付のための画面
@application.route('/new')
def new_post():

    message = 'New memo'
    return render_template('new.html', message = message)

# 新規メモの投稿を行う
@application.route('/create', methods=['POST'])
def create_post():

    message = 'Create your memo'

    new_post = Post()
    new_post.title = request.form['title']
    new_post.content = request.form['content']
    db.session.add(new_post)
    db.session.commit()

    post = Post.query.get(new_post.id)

    return render_template('show.html', message = message, post = post)

# メモの削除
@application.route('/destroy/<int:id>')
def destroy_post(id):

    message = 'Destroy your memo ' + str(id)

    destroy_post = Post.query.get(id)
    db.session.delete(destroy_post)
    db.session.commit()

    posts = Post.query.all()

    return render_template('list.html', message = message, posts = posts)

# メモの編集のための画面
@application.route('/edit/<int:id>')
def edit_post(id):

    message = 'Edit your memo ' + str(id)
    post = Post.query.get(id)

    return render_template('edit.html', message = message, post = post)

# メモの編集を行う
@application.route('/update/<int:id>', methods=['POST'])
def update_post(id):

    message = 'Update your memo ' + str(id)

    post = Post.query.get(id)
    post.title = request.form['title']
    post.content = request.form['content']
    db.session.commit()

    return render_template('show.html', message = message, post = post)

# アプリを実行
if __name__ == "__main__":
    # debugをTrueにセットするとdebug出力ができます。デプロイの際には除く
    application.debug = True
    application.run()
application.py(EB用)
from flask import Flask, request, render_template, send_from_directory
from flask_sqlalchemy import SQLAlchemy
from flaskext.markdown import Markdown
import os

application = Flask(__name__)
Markdown(application)

# flask_sqlalchemyによるAmazon RDSへの接続情報
db_uri = 'mysql+pymysql://' + os.environ['RDS_USERNAME'] + ':' + os.environ['RDS_PASSWORD'] + '@' + os.environ['RDS_HOSTNAME'] + ':' + os.environ['RDS_PORT'] + '/' + os.environ['RDS_DB_NAME'] + '?charset=utf8'
application.config['SQLALCHEMY_DATABASE_URI'] = db_uri
application.config['SQLALCHEMY_TRACK_MODIFICATIONS'] = False
db = SQLAlchemy(application)

# dbデータベースをPythonのオブジェクトにします
class Post(db.Model):
    __tablename__ = 'posts'
    id = db.Column(db.Integer, primary_key=True, autoincrement=True)
    title = db.Column(db.Text())
    content = db.Column(db.Text())

# メモの一覧画面
@application.route('/')
def list():

    message = 'bond.mother メモ帳'
    posts = Post.query.all()

    return render_template('list.html', message = message, posts = posts)

# faviconを設定
@application.route('/favicon.ico')
def favicon():
     return send_from_directory(os.path.join(application.root_path, 'static'),
                               'favicon.ico', mimetype='image/vnd.microsoft.icon')

# id番目のメモを表示
@application.route('/show/<int:id>')
def show_post(id):

    message = 'Your memo ' + str(id)
    post = Post.query.get(id)

    return render_template('show.html', message = message, post = post)

# 新規メモ受付のための画面
@application.route('/new')
def new_post():

    message = 'New memo'
    return render_template('new.html', message = message)

# 新規メモの投稿を行う
@application.route('/create', methods=['POST'])
def create_post():

    message = 'Create your memo'

    new_post = Post()
    new_post.title = request.form['title']
    new_post.content = request.form['content']
    db.session.add(new_post)
    db.session.commit()

    post = Post.query.get(new_post.id)

    return render_template('show.html', message = message, post = post)

# メモの削除
@application.route('/destroy/<int:id>')
def destroy_post(id):

    message = 'Destroy your memo ' + str(id)

    destroy_post = Post.query.get(id)
    db.session.delete(destroy_post)
    db.session.commit()

    posts = Post.query.all()

    return render_template('list.html', message = message, posts = posts)

# メモの編集のための画面
@application.route('/edit/<int:id>')
def edit_post(id):

    message = 'Edit your memo ' + str(id)
    post = Post.query.get(id)

    return render_template('edit.html', message = message, post = post)

# メモの編集を行う
@application.route('/update/<int:id>', methods=['POST'])
def update_post(id):

    message = 'Update your memo ' + str(id)

    post = Post.query.get(id)
    post.title = request.form['title']
    post.content = request.form['content']
    db.session.commit()

    return render_template('show.html', message = message, post = post)

# アプリを実行
if __name__ == "__main__":
    # debugをTrueにセットするとdebug出力ができます。デプロイの際には除く
    application.debug = True
    application.run()
list.html
{% extends 'layout.html' %}
{% block content %}
    <h1>{{ message }}</h1>

    <table>
        <tr><th>ID</th><th>タイトル</th></tr>
        {% for post in posts %}
            <tr>
                <td>{{ post.id }}</td>
                <td><a href="/show/{{ post.id }}">{{ post.title }}</a></td>
            </tr>
        {% endfor %}
    </table>

    <p><a href="/new">新規メモ</a></p>

{% endblock %}
layout.html
<!DOCTYPE html>
<html lang="ja">
    <head>
        <meta charset="utf-8">
        <title>bond.motherメモ帳</title>
        <style>body {padding: 10px;}</style>
    </head>
    <body>
        <p>時代はBond -layout.html</p>
        {% block content %}
        {% endblock %}
    </body>
</html>
new.html
{% extends 'layout.html' %}
{% block content %}
    <h1>{{ message }}</h1>
    <form action="/create" method="post">
        <label for="title">タイトル</label><br>
        <input type="text" name="title" value="">
        <p></p>
        <label for="content">本文</label><br>
        <textarea name="content" cols="40" rows="10"></textarea>
        <p></p>
        <button type="submit">保存する</button>
        <a href='/'>キャンセル</a>
    </form>
{% endblock %}
show.html
{% extends 'layout.html' %}
{% block content %}
    <h1>{{ message }}</h1>
    <p>タイトル:{{post.title}}</p>
    {{ post.content | markdown }}

    <p><a href='/'>一覧に戻る</a> | <a href='/edit/{{ post.id }}'>編集</a> | <a href='/destroy/{{ post.id }}'>削除</a></p>

{% endblock %}
edit.html
{% extends 'layout.html' %}
{% block content %}
    <h1>{{ message }}</h1>
    <form action="/update/{{ post.id }}" method="post">
        <label for="title">タイトル</label><br>
        <input type="text" name="title" value="{{ post.title }}">
        <p></p>
        <label for="content">本文</label><br>
        <textarea name="content" cols="40" rows="10">{{ post.content }}</textarea>
        <p></p>
        <button type="submit">保存する</button>
        <a href='/show/{{ post.id }}'>キャンセル</a>
    </form>
{% endblock %}
ローカル環境での動作確認
ローカルでの動作確認は、MAMPを使って行いました。

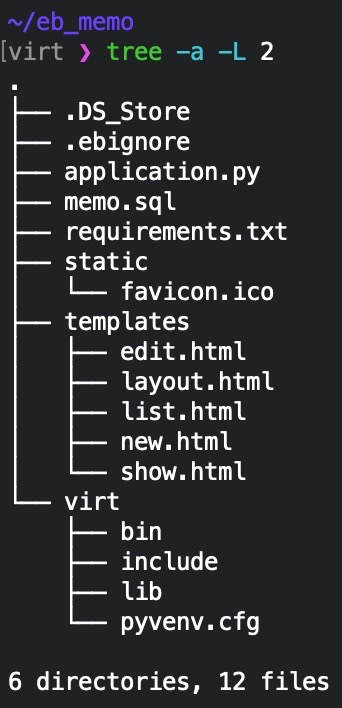
ディレクトリ構成
プロジェクトディレクトリ「~/eb_memo」の構造は以下です。
「.ebignore」「requirements.txt」ファイルはローカル環境で動作確認をする時は必要ありません。今回はファビコン用のファイル「favicon.ico」も追加しました。
仮想環境virtの設定、「.ebignore」の作成方法は、「Flaskで作ったWebアプリをAWS Elastic Beanstalkにデプロイしてみた〜第1弾〜」を参考にしてください。

今回は、仮想環境に以下のモジュールをインストールしています。
これはデータベースを操作するためのものと、Markdown記法を使用するためのものです。
(virt) ~/eb_memo % pip install flask sqlalchemy PyMySQL Flask-Markdown flask_sqlalchemy「pip freeze」の実行結果は以下の通りです。
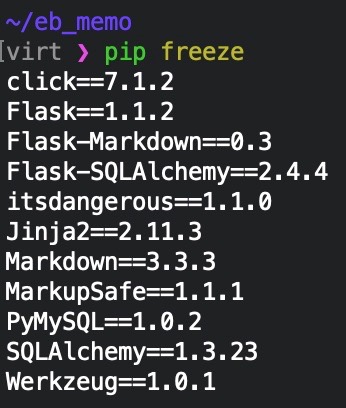
この出力内容を、「pip freeze > requirements.txt」を実行することで要件ファイルに保存します。
MAMPで動作確認
MAMPを起動した後、以下のコマンドを実行します。
(virt) ~/eb_memo % python application.pyその後、Webブラウザで「http://localhost:5000」にアクセスすると・・・
成功しました!
AWS Elastic Beanstalkにデプロイ
Elastic Beanstalkのインストール、設定については、「Flaskで作ったWebアプリをAWS Elastic Beanstalkにデプロイしてみた〜第1弾〜」の記事を確認してください。
それでは、EB環境を作成してから、そこにDBインスタンスを追加していきます。
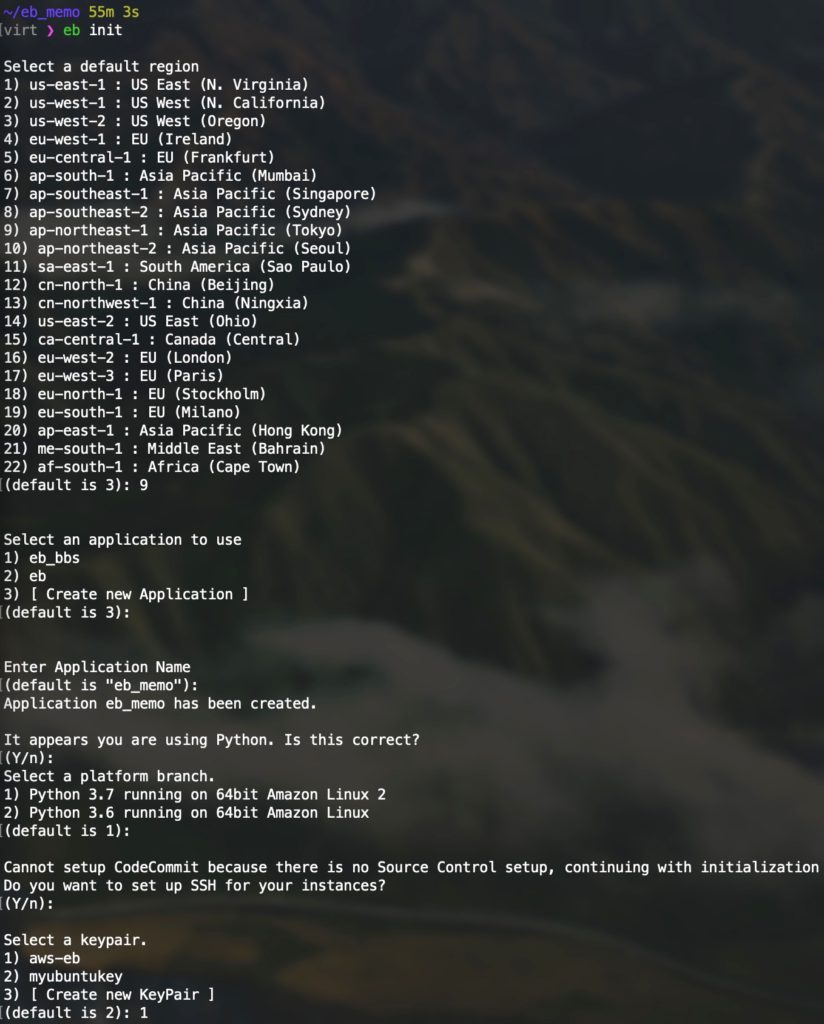
EB環境作成
まずは「eb init」コマンドで、EBアプリケーション「eb_memo」を作ります。
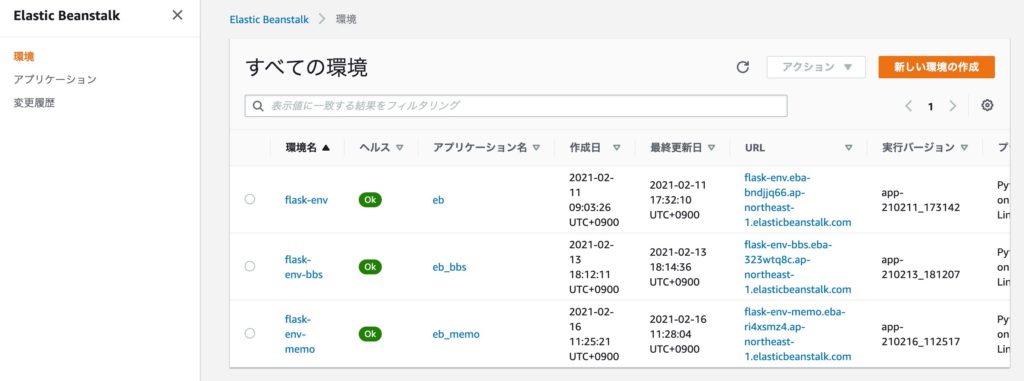
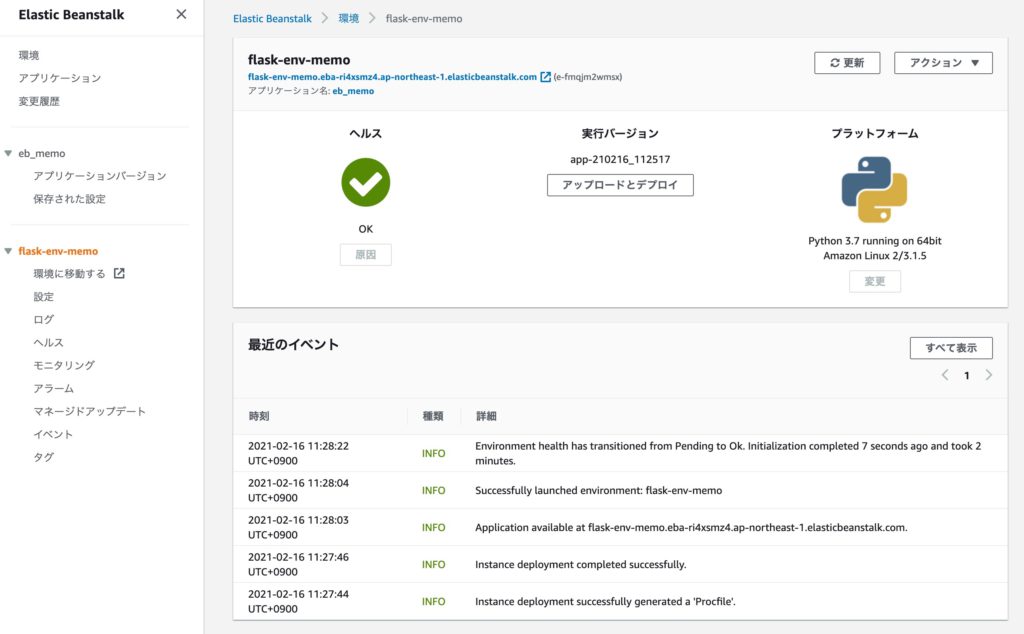
「eb create」でEB環境 「flask-env-memo」 を作成します。

今回は完了するまで2分53秒かかりました。
DBインスタンス追加
それでは、Elastic BeanstalkコンソールからDBインスタンスを追加していきます。
まずはElastic Beanstalk コンソールを開きます。
先程作成した環境名 「flask-env-memo」 をクリックします。
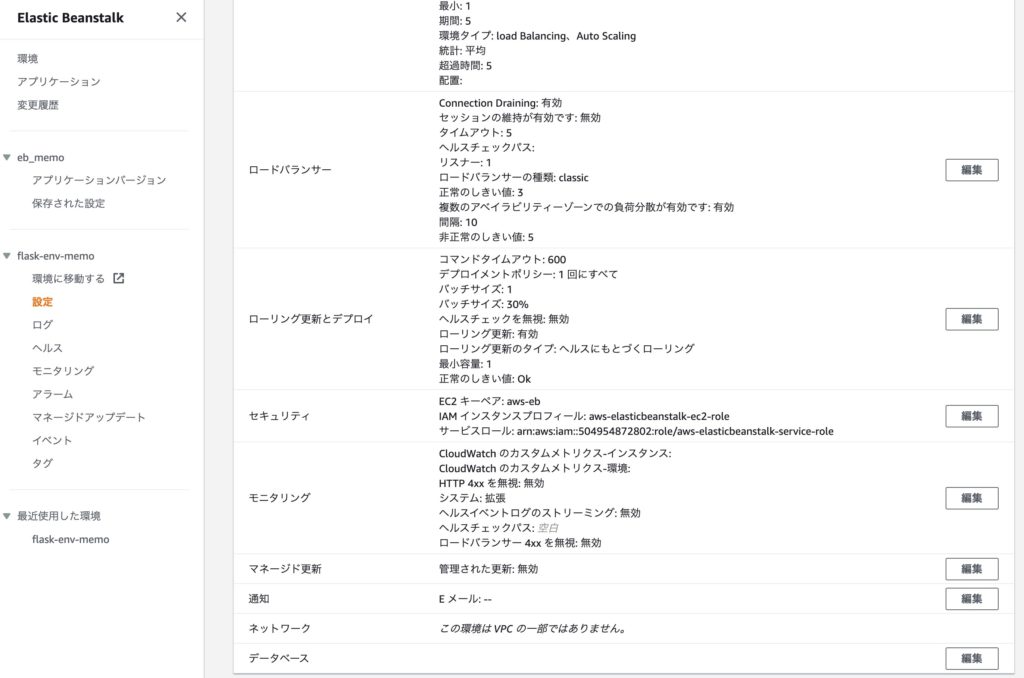
ナビゲーションペイン(画面左のカラム)の「設定」をクリックし、開いた設定で一番下までスクロールして、[データベース]設定カテゴリの[編集]ボタン(右下)をクリックします。
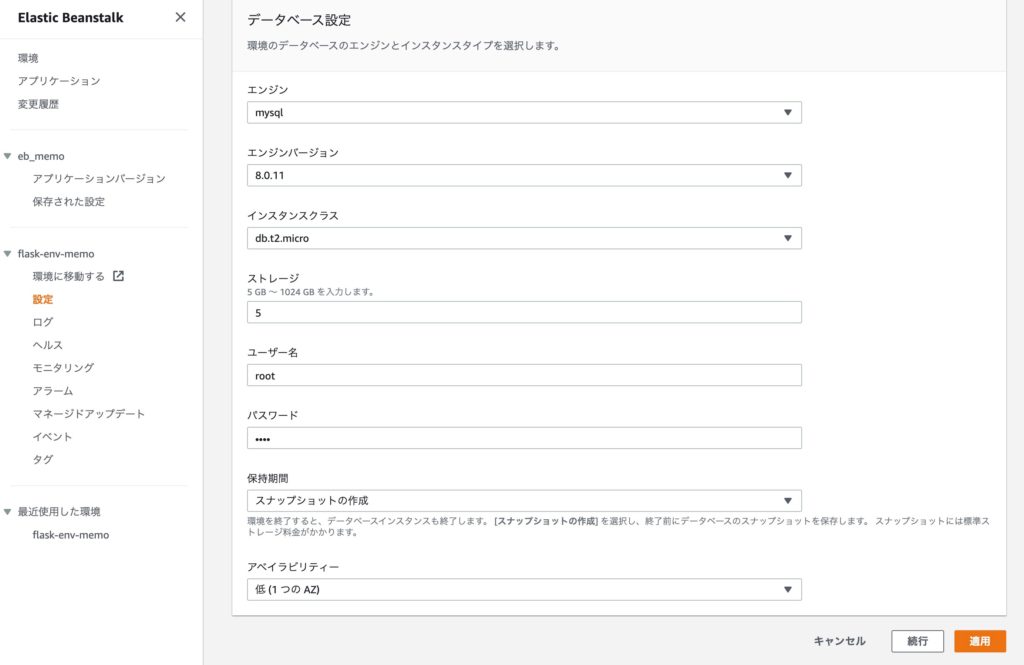
データベース設定を開いたら、ユーザー名とパスワードを入力します。このユーザ名とパスワードは、「application.py」の中の「db_uri = 」の箇所に記述します。※パスワードは8文字以上です。
他はデフォルトのままにしました。右下の[適用]ボタンをクリックします。
DBインスタンスの作成が完了するまで、ガイドに従って10分程度待ちます。

無事に完了すると、「ヘルス」がOKと表示されます。

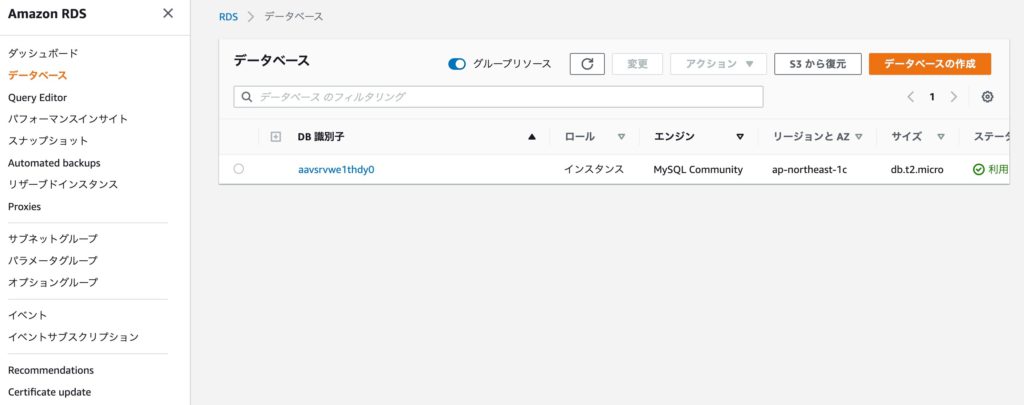
Amazon RDS コンソールを見ると、MySQLデータベースが作成されていることが確認できました。
RDSのセキュリティグループ編集
作成したMySQLデータベースをクリックし、その情報をRDSコンソールで確認します。

下にスクロールすると、セキュリティーグループのルールが表示されています。
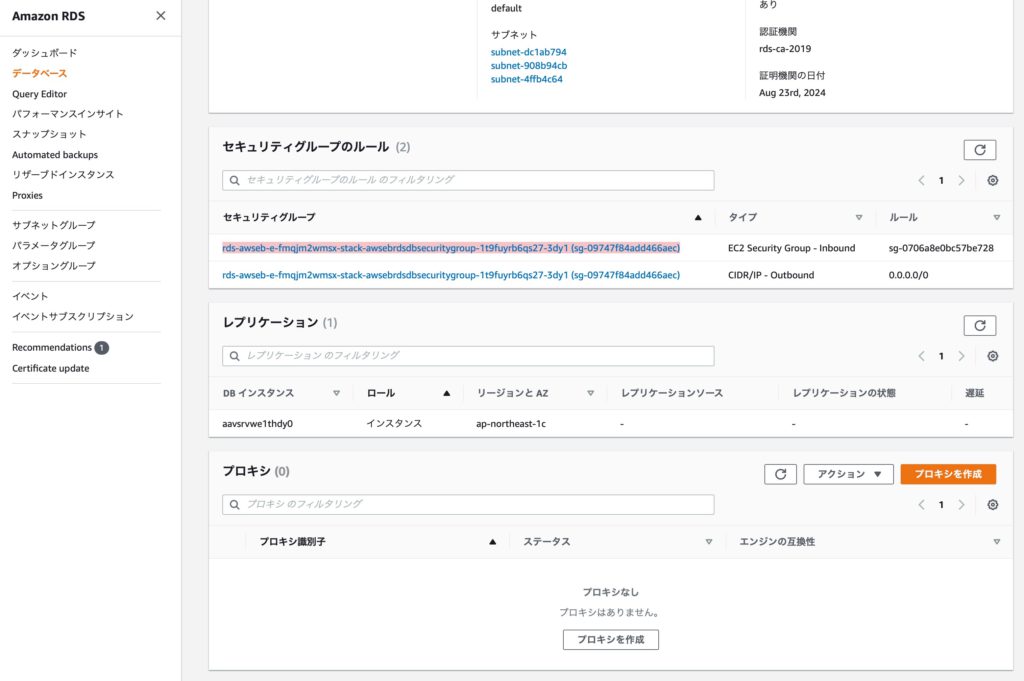
AWSのベストプラクティスとは異なりますが、今回はMac(ローカルマシン)からデータベースに接続して操作する方法を取りました。※セキュリティ面を考えれば、EC2からのみ接続できる構成にした方が良いです。
セキュリティグループの「インバウンドルール」タブをクリックして、以下のように「ソース」の値を「0.0.0.0/0」と「::/0」に編集します。
※「0.0.0.0/0」はすべての発信IPv4トラフィックを許可し、「::/0」はすべての発信IPv6トラフィックを許可します。
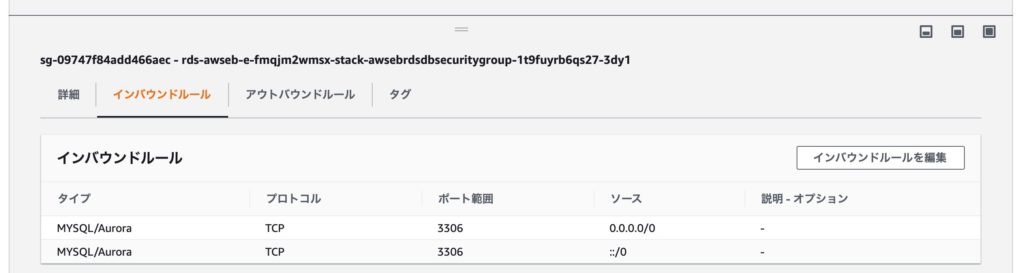
こうすることで、RDSへの外部からの接続を許可しました。
MacにMySQLクライアントツールをインストール
次は、Mac(ローカルマシン)からMySQLを操作するための、MySQLクライアントツールをインストールします。
macOS BigSurで使えるMySQL Shellを選択しました。

サイトの指示に従ってインストールを行います。インストールが完了すると、ターミナルで ”mysqlsh”コマンドが使えるようになっています。
データベースにテーブルを作成
デフォルトのデータベース”ebdb”に”posts”という名前のテーブルを作るためのSQLスクリプト「memo.sql」を作ります。テーブル名は「application.py」に記載した名称と揃える必要があります。
use ebdb;
CREATE TABLE posts (
id INT NOT NULL PRIMARY KEY AUTO_INCREMENT,
title VARCHAR(255),
content TEXT
);
INSERT INTO posts(title,content)
VALUES
("hello Bond","hello Bond"),
("hello Kubao","hello Kubao"),
("hello Pirio","hello Pirio"),
("markdownメモ",
"#ボンドさん、こんにちは。\n\nよろしくお願いします。\n\n
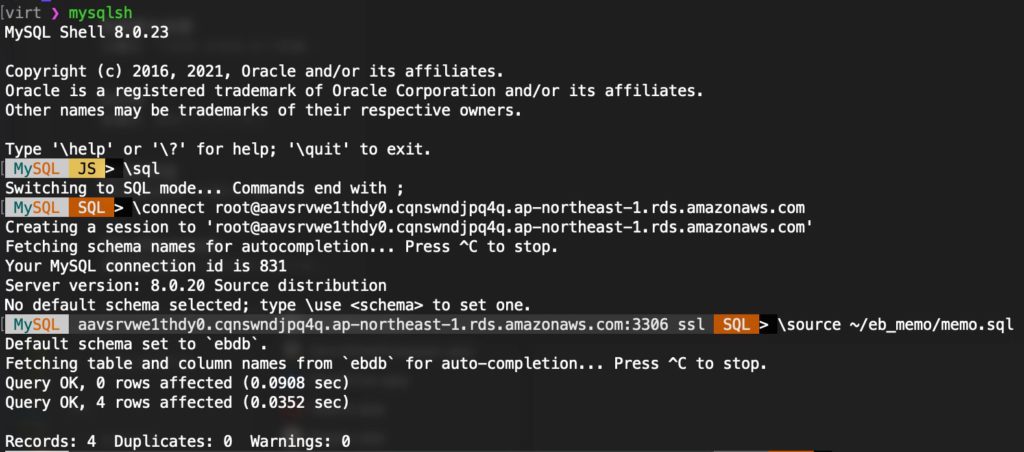
##本日のお買い得\n\n- apple\n- orange\n- jucie");コマンド「mysqlsh」でMySQL Shellを起動し、「\sql」でSQLモードに切り替えます。
「\connect ユーザー名@エンドポイント」で、Amazon RDSのデータベースに接続できます。初めて接続する時はパスワードを聞かれますが、Shellに保存すれば2回目以降は聞かれません。
「\source ~/eb_memo/memo.sql 」を実行し、テーブル”posts”を作成します。
作成したテーブルの内容は以下の様に確認できます。

デプロイ
いつものように、Mac上で「eb deploy」と「eb open」を実行すれば完了です。
デプロイする前に、「application.py」がEB用になっていることを確認します。
% eb deploy
% eb open
以上、お疲れ様でした。


コメント